Attaching Support Lines
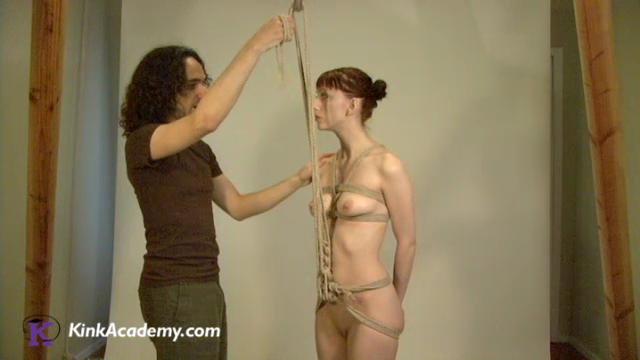
When attaching support lines to a harness for suspension, I use a novel method that people frequently ask me about, and I've been meaning to document for a long time. Serendipitously, I ran into Kali from Kink Academy a few months ago at Wicked Grounds, and she asked me to film some instructional videos for them on suspension -- so I managed to slip this in there, and they've graciously agreed to allow me to use screenshots from those videos to illustrate a blog post here.
This method was inspired by the Tatu hitch, during a Fetlife discussion whose details are now murky in my memory -- in any case credit is due both Tatu and Jack Elfrink for making me aware of that knot, upon which this is based. Things needing names, and this technique using the first half of a Tatu hitch, I suppose we could call it the half-Tatu hitch.
Thanks also to Mecha-Kate for modeling for these. The full video version, in two parts, is here and here on Kink Academy. It's not free, but it's also hardly expensive -- and if you sign up using those links, I'll be getting half the proceeds.
Single Point Attachment, with Carabiner
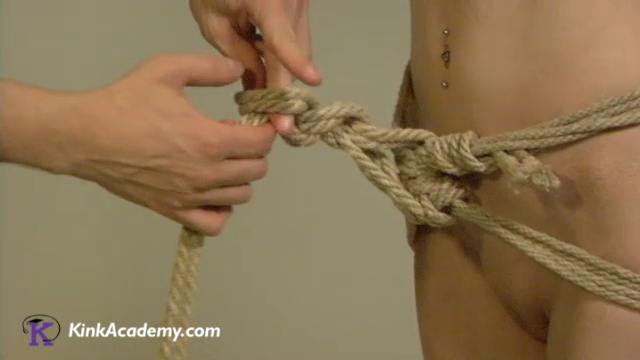
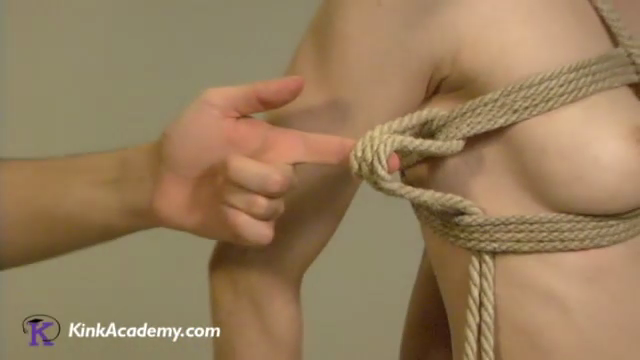
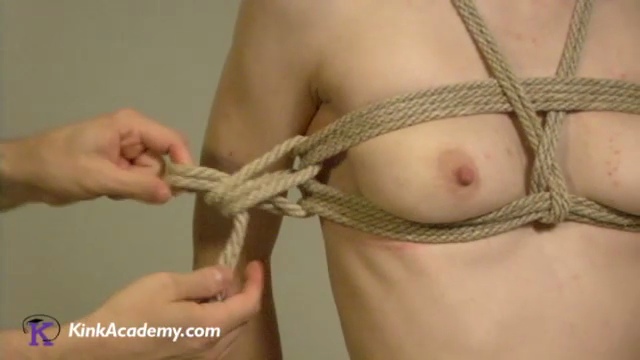
Starting with the bight end of a doubled rope, form a new double-bight and pass that under the point you are attaching to, while keeping the center-bight on the side it started on:
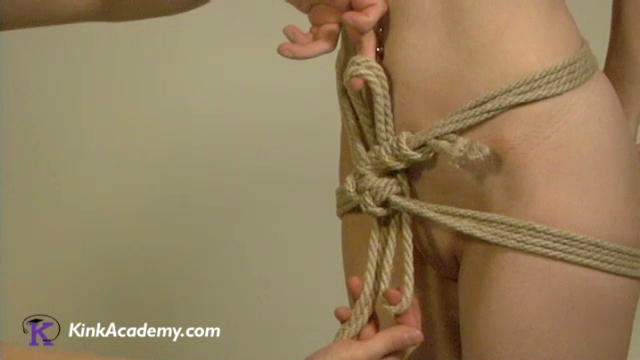
Next, fold the single bight up against the double-bight, aligning all three loops:
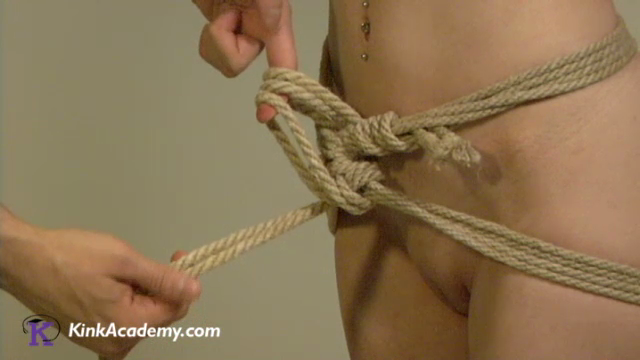
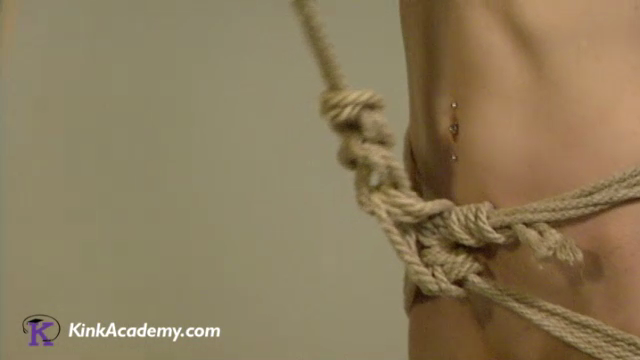
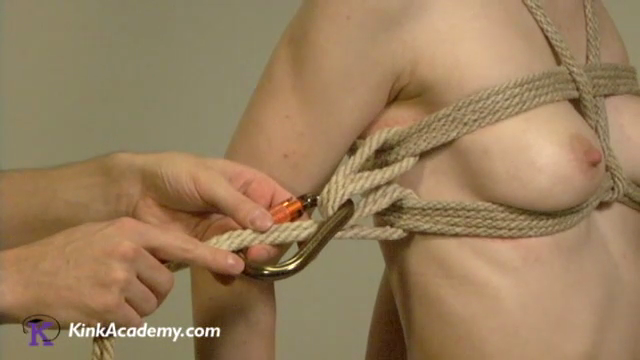
Now clip a carabiner through all three loops, and around the standing line:

For asymmetrical biners, rotate the fat end away from the harness as shown, to make more space for use as a pulley.
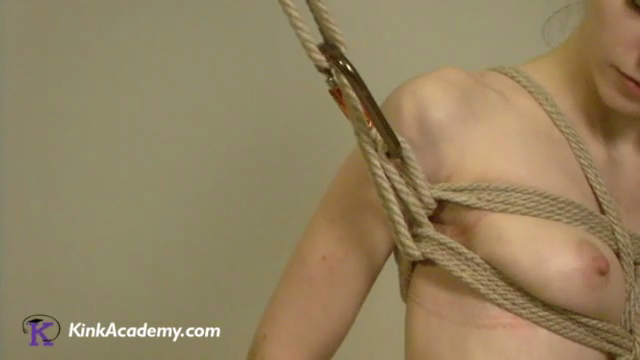
VERY IMPORTANT: This is not done. At this point, if you pull on the rope, the carabiner will be yanked up against the body and pulled around the harness in a most ungainly way. While the support line can't actually come off, it will extend somewhat, and the carabiner could mess up your bottom. You need to also plan for (or make sure you have enough rope to avoid) passing back through this configuration while lowering, if you might lower past the point you lifted from.
From here, you want to go up through your ring, then back down and through the carabiner again:
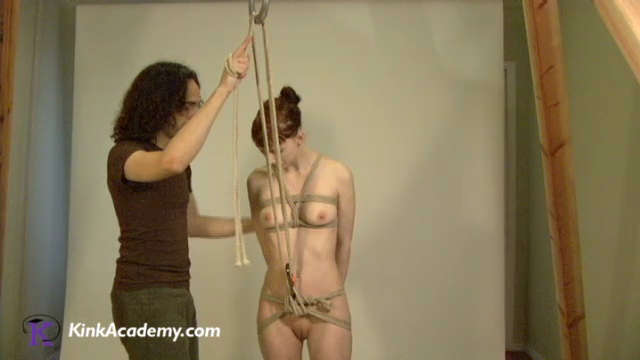
Now you can lift, and the carabiner will stay at exactly the same distance from the harness it started. The above shows the rope also going through the ring a second time, but that's not required; if you prefer to lift up instead of pulling down, you can start lifting as soon as you've run back through the carabiner again. More times back and forth don't hurt, but they don't really help either, because of added friction.
Single Point Attachment, without Carabiner
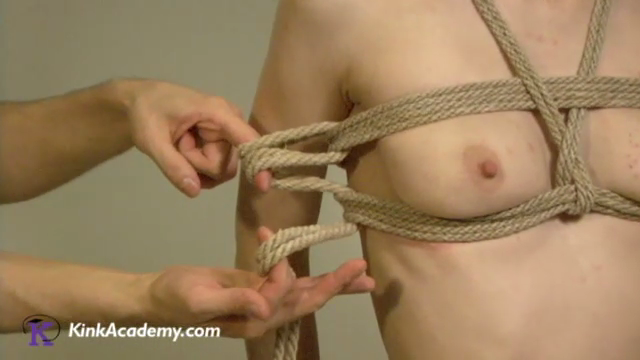
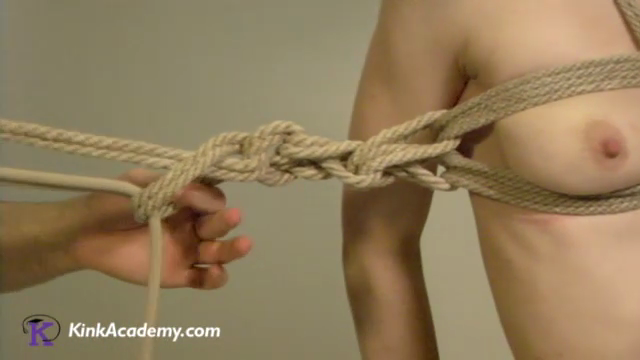
If you don't want or need a carabiner on the bottom (which reduces lift friction, but could be argued against on aesthetic grounds), you can instead, from the point where you've got the three bights aligned, form a bight in the standing line and pass that through the triple bight, starting a daisy chain:
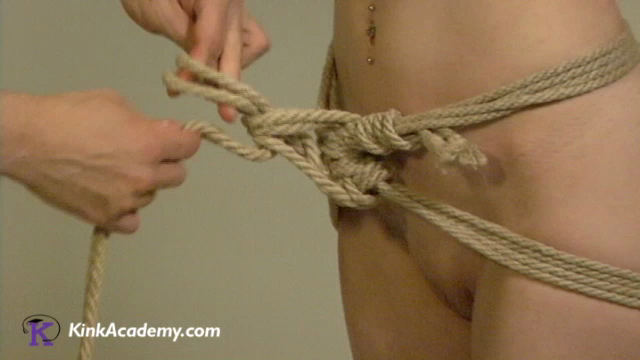
Chain this once or twice more, then pull the whole rope through the last one to lock it off:
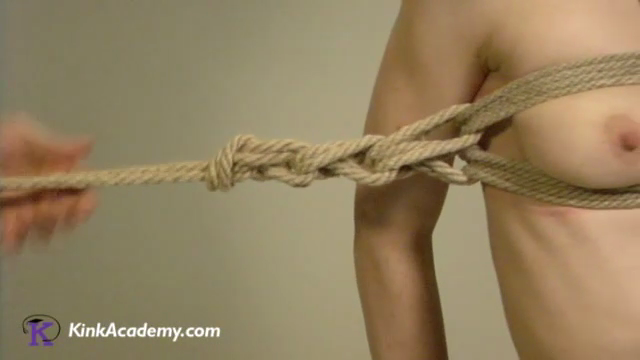
Now unlike the carabiner variation, this is totally solid and locked off at this point; you can lift away from here. But if you want some leverage, you can come back down and go through all three bights again with the running end:
Hanger, with Carabiner
If you're not sold on this method yet, stay with me for a moment, because here's where it really shines. Sometimes you want to attach to a harness at multiple points, leaving some distance between them. And this method adapts beautifully to that situation. For two points, which I'll show here, you barely have to modify it at all; and for more than two, you can pretty much just add additional double-bights between each point.
Hanger, without Carabiner
Finally, of course, you can do a split hanger without a carabiner, using the daisy chaining method. In this case, there's an additional difference to keep in mind, which is that the carabiner version of the hanger has a neat property whereby it will self-equalize as the angle changes, due to the double-bight part being free to pass back and forth through the biner. The daisy-chain version adds a lot of friction and won't do that as much, behaving more like most other hanger techniques, where you set the angle when you tie the knot.
So is it safe?
There is one important drawback to this method, in case you didn't catch it: if your rope breaks at the center point, this is going to come right off and they are going to fall straight down. So while this method does a lot to reduce both wear and load on the center point, if your rope is already weakened there, you might want to think twice about using it for this. But if you're not totally confident in the integrity of your rope, you might want to think twice about using it for support lines at all. You'll notice in these pictures I'm using 8mm hemp for the support lines even though the harness is 6mm -- when using natural fiber rope, I prefer to have as much extra safety margin as reasonably possible, given that rope can break during suspension.